PLEASE NOTE: COPYRIGHT AND MAY NOT BE SOLD.
|
New tutorial showing how to make a mold and cast in resin or polymer clay.
https://youtu.be/VrkCZcSHLFI |
MAKING A SIMPLE MOLD OF A CHARM WITH MINIMOLDING ™
|
MAKING A SIMPLE MOLD OF A CHARM WITH MiniMolding TM
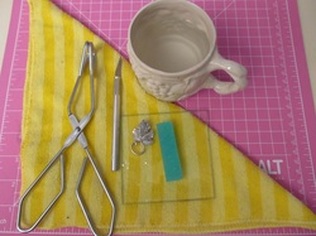
Copyright Cheryl Clingen© 2013 Materials required: 1 stick Mini Mold Smooth table top Cup of boiled water Kitchen tongs or chopsticks Kitchen Towel Glass coaster or mirror Craft knife (optional - just to trim the mould) This simple mould is the basis of all the tutorials to follow. You will be led through the basic process of making a mould of a metal leaf (which also just happens to be part of my logo). Please feel free to share this tutorial with anyone, but you may not sell it. |
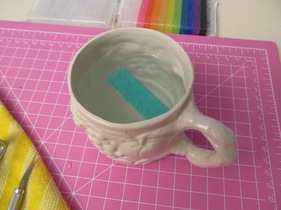
Boil some water in a kettle or pot and pour into a cup. This is the safest way for children to use
MiniMolding under the supervision of adults. The way I recommend adults to handle hot water is to use a hot plate with a thermostat o keep the water hot but not boiling. The recommended water temperature is about 75ºC .
Place your piece of Mini Mold into the cup and leave it in the hot water for about 3 minutes. By then it melts and becomes pliable You can test it by prodding it with a stick.
If the water is not hot enough, the Mini Mold will take longer to soften or will not soften enough, so make sure the water is fresh from the kettle or .at least 75C
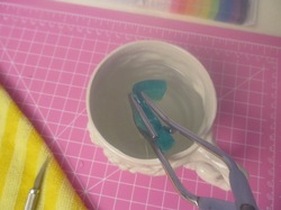
Have your tongs and kitchen cloth ready…
|
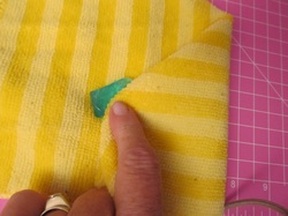
Using the kitchen tongs, carefully take the soft MiniMolding out of the hot water and place onto your kitchen towel.
|
|
Please be aware that the water is very hot, but the MiniMolding is very warm. If you are sensitive to hot things, you can use gloves. You should dry the MiniMolding well to make sure any pockets of water are absorbed into the cloth. Sometimes, when re-using Mini Mold, you could get bubbles of hot water that can burst when handling the Mini Mold, and the water can spray out onto you - ouch.
Children should be supervised by adults in this first process. |
|
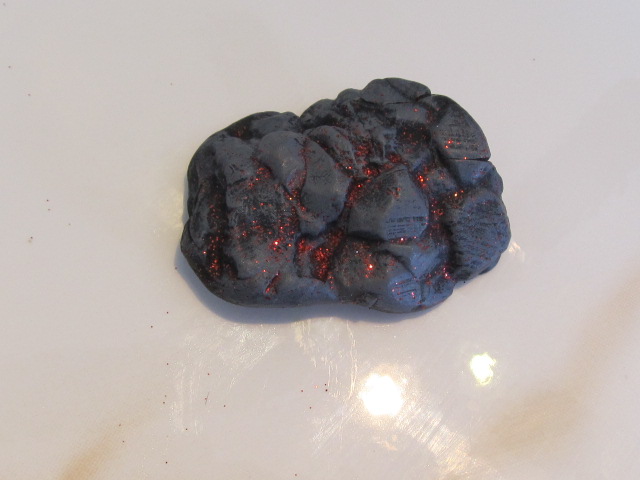
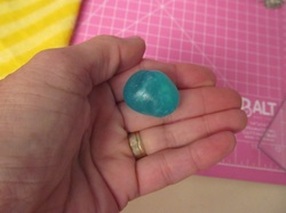
Once you have patted the MM dry, it is safe to handle. Squish it and roll it into a ball and the press it into a rough shape of what you would like to mould, such as a circle, square, diamond or custom shape.
|
|
d
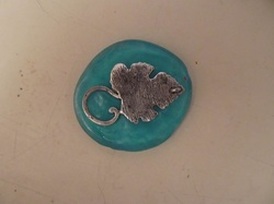
Flatten it on a smooth table top to more or less fit the charm you want to mold. Push your charm into the MiniMolding slowly and firmly to make sure all the details will be take up. Do this slowly so that the MiniMolding has a chance to take up all the crevices of your charm. Hurrying this part may result in the full detail not being taken up. |
|
To make sure that it is flat, place the glass coaster on top and push it down firmly getting the surface of your MiniMolding nice and flat and even. I also use a small spirit level at this point to make sure it's level. If your mould is uneven, your resin may also end up thin in one area and thick in another. I recommend you invest in a spirit level. It's not that expensive, and will be worth it's weight in gold. I have had uneven mould, and ended up trying to place toothpicks or rulers under one end, and believe me, it can be messy.If you are using clay it makes no difference if your mould is not level, but any liquid will run to the low side of your MiniMolding.
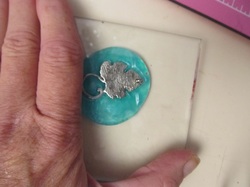
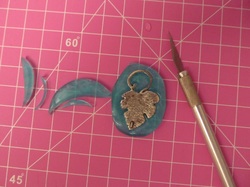
Remove the glass coaster and all to cool for about 3-5 minutes. If you want to cool it off faster, you can plunge it as is into a cup of cold water. The Mini Mold mould will be ready in about 30 seconds! Trim your mould with a craft knife. This step is optional and is just for appearance sake. Neat molds are easier to store and pleasanter to work with. If you like, you may skip this step and just pat the edges of your mould (while it is still pliable) with your fingers or a pencil to neaten it into a pleasing shape. Remember to leave a reasonable margin around the charm for handling when using your clay or resin. I could make another mold of the blue leaf by reusing the MM and this creating a new original mould. |
|
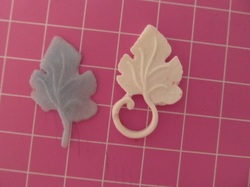
And there you go! You have quickly and easily made your first MM mould!! It is ready to have clay pressed into it or resin poured into it. |
|
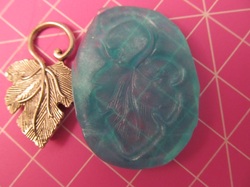
The picture here shows the liquid glass leaf I made (by adding a little blue acrylic paint and glitter) and a resin poured one. The blue leaf I altered by cutting the stem off which suited my logo better.
Thanks for coming along on this mould-making trip with me, and I’ll be seeing you again soon with my next tutorial. Take care Cheryl C |
