MAKING A 2-PART MOULD WITH MINI MOLD ™
For use with polymer clay.
Copyright Cheryl Clingen© 2014
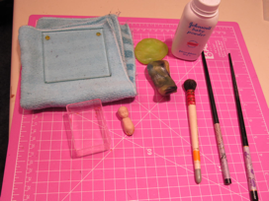
Materials required:
5 sticks Mini Mold
Small Plastic container
Cup of boiled water
Kitchen tongs or chopsticks
Kitchen or hand Towel
Baby powder or conflour
Baby doll head/torso( my choice)
toothpick
Craft knife
You’ll notice I have chosen to re-use some Mini Mold.
Because we are making a 2 part mould for use with polymer clay, we do not need to make a pouring hole. This will be explained in the next tutorial:
Making a 2-part Mould for use with Resin.
Prepare the doll and the plastic container.
As there are holes in this piece for attaching arms and legs, you need to plug them neatly with some prestik (blue tack) or hot glue. Just a note, I tried using plastercine, but it’s difficult to clean off the finished mold as the plasticise is soft and difficult to remove from the Mini Mold. Make sure that the plugged arm and leg holes are neatly flush with the body. This is done to prevent the mould from getting stuck inside the holes. It will be very difficult to remove the master from the mould without tearing it. Remember, your final product will only be as good as your mould.
Use baby powder or cornflour to dust the plastic box to make it easier to remove the mould when done. Sprinkle the powder in the box, then dust it out with a soft brush. make sure you get most of the powder out. Although it will not affect the Mini Mold, it may affect the final product.
Boil water in a kettle or pot. Pour just boiled water into the cup or any other convenient container . Carefully place 3 pieces of Mini Mold in the colour of your choice into the cup. Leave for about 3 minutes. It will soften and become pliable during this time.
(tip )If you are making a very small mould, you can cut your piece of Mini Mould into the needed size with a craft knife or a pair of scissors. If you are making a larger mould, you can mix 2 or more pieces of Mini Mold by just putting them into the water together. The colour is not important. While we are talking about colour, a question I am often asked is "why the different colours?" I like to colour code my moulds, e.g. male heads blue, female heads pink, children heads yellow, lady arms purple, man arms green, children arms gold,furniture green etc. The clear is very useful to use as the top part of a 2 part mould as it is transparent. When you pour resin into a mould, you can check for air bubbles which can become trapped in undercuts. Tap the mould and lean it backward and forward to get a bubble to rise to the top of the mould.
Have your tongs and kitchen towel or hand towel ready...
Using the chopsticks (my choice today - l like to be versatile ) carefully take the soft Mini Mold out of the hot water and place onto your kitchen towel. Fold the towel over the Mini Mold and press until all the water is absorbed from the Mini Mold. When this is done, you can easily handle the Mini Mold, mix pieces together or shape it. The Mini Mold will be warm but not hot as the water.
Sometimes, when re-using Mini Mold, bubbles of hot water get trapped in the Mini Mold which can burst when handling the Mini Mold. This water will be very hot - it can spray out and scald you - Please be careful and make sure you dry the Mini Mold well pressing it quite hard with with towel to make sure you get all the water out.
Roll into a ball - place another 3 pieces into the hot water for the second half of the mould.
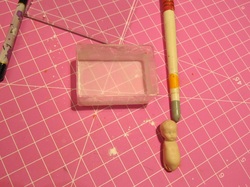
Push the Mini Mold into the plastic container making sure it is thick enough to be more than ½ the thickness of the item you want to mould.
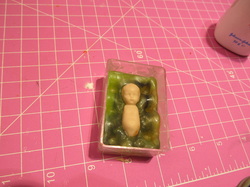
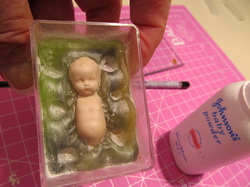
Push the doll in slowly making sure it is half covered with the Mini Mold. Check underneath that the doll has not gone through to the bottom of the container, which would make a hole in your mould and would make pouring of resin all but impossible.
Using the back of a brush or chopstick, push it into the mould around the doll to make a “key”. This is important when you make the second half. Make about 4-6 dents. You can make them of various depths and sizes, but not too deep or too small. Make sure the where the Mini Mold touches the doll, it is flat against it.
You can wait till the Mini Mold is cold which will take about 3-5 minutes depending on the weather or do it like some impatient people do (like me) and float or plunge the whole thing into ice water for about 10-20 seconds. Remember to dry it well before going on to the next step.
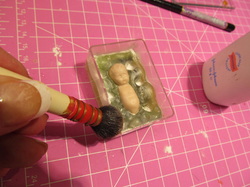
Dust the Mini Mold, doll and box again with baby powder or cornflour. Brush excess off with a soft brush, especially the keys. This will help in achieving a tight fit with the 2nd half of the mould.
Dust the Mini Mold, doll and box again with baby powder or cornflour. Brush excess off with a soft brush, especially the keys. This will help in achieving a tight fit with the 2nd half of the mould.
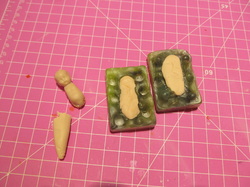
Tap the mould upside down to remove excess powder, and brush it again. Your mold should look like this:
Its time to use the rest of your Mini Mold.
Remove it from the hot water with your chopsticks/tongs check that it’s pliable enough. If not, reheat the water and let is soak awhile. Remove from hot water and pat dry.
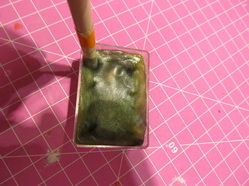
Push is well into the box over the top of the doll, making sure you push the Mini Mold into the keys (debts) you made. I used the back of the brush to make the keys and used it again to make sure that the top layer went well into the holes.
Press hard against the Mini Mold with your fingers making sure you have covered ev every part of the doll and not left any gaps. If this happens, you just re-heat the Mini Mold and start again. No problem.
Once you are sure it’s as it should be, you will have about 3-5 minutes to go and have a cup of tea, or drop it into cold water to cool it within about 20 seconds.
When completely cool, carefully remove the top of the mold using a flat plastic stick or knife. It will come out, so just be patient.
Now you have a choice. You can leave the bottom piece of the mould in the container to use as is, or take it out to use the box again for another mould.
Remove it from the hot water with your chopsticks/tongs check that it’s pliable enough. If not, reheat the water and let is soak awhile. Remove from hot water and pat dry.
Push is well into the box over the top of the doll, making sure you push the Mini Mold into the keys (debts) you made. I used the back of the brush to make the keys and used it again to make sure that the top layer went well into the holes.
Press hard against the Mini Mold with your fingers making sure you have covered ev every part of the doll and not left any gaps. If this happens, you just re-heat the Mini Mold and start again. No problem.
Once you are sure it’s as it should be, you will have about 3-5 minutes to go and have a cup of tea, or drop it into cold water to cool it within about 20 seconds.
When completely cool, carefully remove the top of the mold using a flat plastic stick or knife. It will come out, so just be patient.
Now you have a choice. You can leave the bottom piece of the mould in the container to use as is, or take it out to use the box again for another mould.
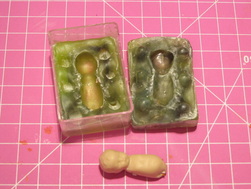
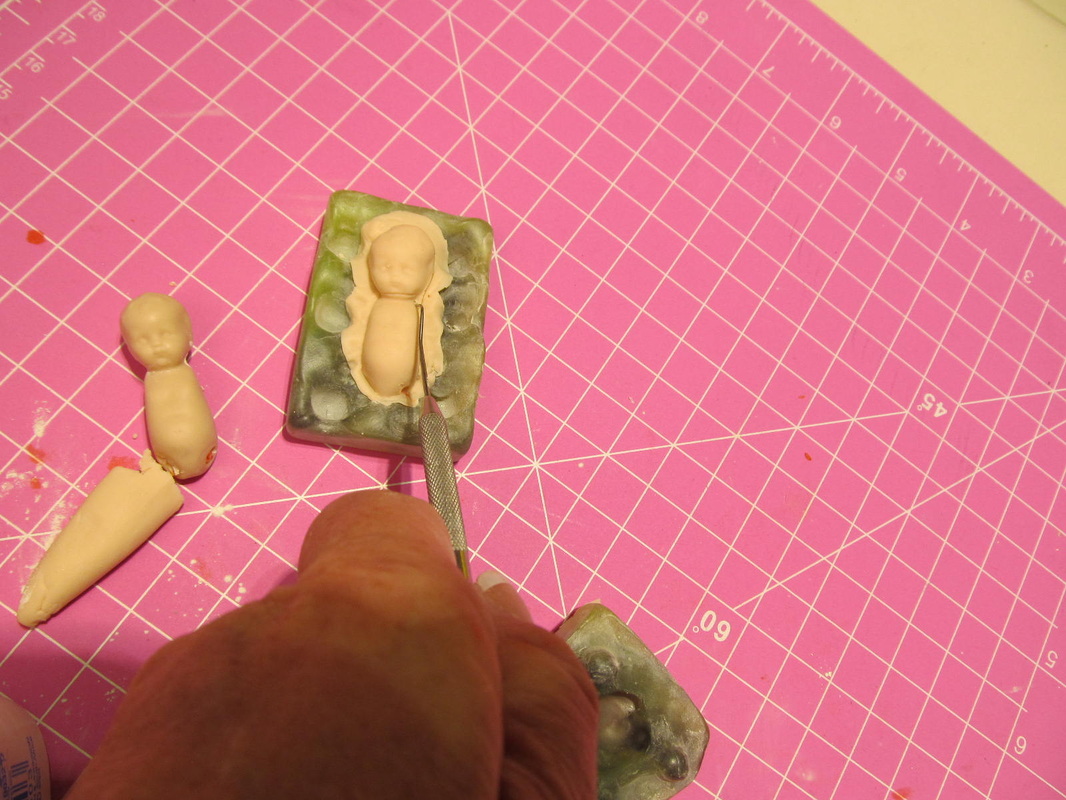
Remove your doll carefully and there you have it - a two part mold to use for polymer clay!
BUT I couldn’t stop there. I just had to test the mold to make sure it was ok…
So, take a ball of clay, cut it in half and push the one half well into one side of the mould and the other into the other side of the mould. You need to do a lot of pressing to make sure that every nook and cranny is well filled. Turn the mould over if necessary to look though the mould to see if there are no air bubbles. (it is translucent when not very thick!)
Remove any excess, or fill if you need more…
TIP!
Never add clay to a space, rather take a litte clay and push it into the center of the clay and squish and force the original clay upwards towards the gap - this way you will not get joining marks.
|
Close the mould and push down on it hard to force the two sides together. This is why we needed the keys. They make sure the mold is together at the correct place and prevents off-setting..
Once you think you’ve done it, gently take the top mould piece off and your will see that the excess has bled out to the sides. Remove with a dentist tool or a toothpick carefully, then repeat the process again. Dorn forget to brush on more powder!
If more squishes out again, repeat the pressing together and cleaning out of excess again and again until you are satisfied.
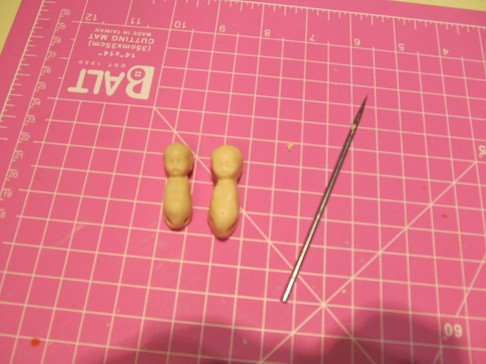
Ok, once there is just a little seam left, gently remove the doll from the mold and using a knitting needle, crochet hook or your fav clay tool, blend the seams away using a gentle rolling movement of your needle. When you are happy, bake the clay in an oven for about 10-15 minutes at 120ºC.
When cool, drill holes through the arm and leg holes so you can string the doll at a later stage.
You can make the arms and legs in the same way. Drill holes, glue hooks into place and you can go ahead and string your doll!!
Didn’t take too long did it?
Don’t forget to paint your doll! I love using a combination of pastels and Genisis Paints to create a natural look.
If you would like me to show you the painting process, let me know and I’ll put up a tutorial. Let me know if you enjoyed this tutorial. I’d love to hear from you! Take care!
Once you think you’ve done it, gently take the top mould piece off and your will see that the excess has bled out to the sides. Remove with a dentist tool or a toothpick carefully, then repeat the process again. Dorn forget to brush on more powder!
If more squishes out again, repeat the pressing together and cleaning out of excess again and again until you are satisfied.
Ok, once there is just a little seam left, gently remove the doll from the mold and using a knitting needle, crochet hook or your fav clay tool, blend the seams away using a gentle rolling movement of your needle. When you are happy, bake the clay in an oven for about 10-15 minutes at 120ºC.
When cool, drill holes through the arm and leg holes so you can string the doll at a later stage.
You can make the arms and legs in the same way. Drill holes, glue hooks into place and you can go ahead and string your doll!!
Didn’t take too long did it?
Don’t forget to paint your doll! I love using a combination of pastels and Genisis Paints to create a natural look.
If you would like me to show you the painting process, let me know and I’ll put up a tutorial. Let me know if you enjoyed this tutorial. I’d love to hear from you! Take care!